Wednesday, February 29, 2012

Sink or Float

Since we have been talking a lot about boats and sailing, we decided to do a sink or float activity today. I gathered several objects that would sink and several that would float from around the classroom. 
 We filled up a small plastic tub with water and placed it on the floor where all of the children could see it. Before putting each object in the water, we passed it around so that each child could feel it and make a prediction on whether it would sink or float. 
 One by one we put the objects in the water.
 When we were finished, each child went around the classroom and chose a toy to put in the water. They each predicted whether their toy would sink or float. 
 We left the tub of water out on a table for the children to experiment with when the activity was over. 

Sunday, February 26, 2012

Mini Volcanos

 I have been wanting to try this activity for a long time, but I couldn't find small eye droppers. Our director found some at CVS this week so we were finally able to try it. 
To begin, I gave each child a small plate of baking soda, 
an eye dropper, 
and little bowls of vinegar with food coloring. 
We had never used eye droppers before, so it took a little practice for the children to get the hang of how they worked. Once they figured it out, they loved dropping the vinegar onto the plate of baking soda and watching it bubble. 
Because this activity requires children to squeeze with two fingers, it is a fun way for them to work on their small muscle skills. They also enjoyed feeling the difference in the baking soda before the vinegar was added and after it was added. 

Friday, February 24, 2012

Cloud Dough

 I first read about this at www.jugglingwithkids.com. It feels like regular flour but you can mold it into shapes and use it to build.
Recipe
- 8 cups of flour
- 1 cup of baby oil
Mix the ingredients together with you hands in a large bowl until the dough holds together when squeezed. It takes about 3-5 minutes of mixing. 
 We put our Arctic animals in the cloud dough and pretended it was snow. 
 This was a big hit with the two year olds who played with it for hours. 

Tuesday, February 21, 2012

Goldilocks and the Three Bears Activities

In addition to setting up the three bears' cottage in our dramatic play area, here are some other activities related to the story of Goldilocks and the Three Bears.

Dressing Bears
I cut out bears and bear clothes from scrapbooking paper. The children chose the clothes they liked and glued them onto their bears. 
 Sizing Bears
The children arranged the bear family, according to size, on a piece of construction paper and painted them.  
 Hard and Soft
We felt things that were hard like Papa Bear's bed and things that were soft like Mama Bear's bed. Then we sorted them and glued them onto paper. 
Hot and Cold
We made a list of things that are hot like Papa Bear's porridge and things that are cold like Mama Bear's porridge.  
 Making Porridge
We made porridge (oatmeal) for morning snack.  

Thursday, February 16, 2012

The Three Bears

 The story of Goldilocks and the Three Bears has been a favorite of every group of children that I have read it to. There are so many versions of this classic tale available. Some of my favorites are The Three Bears by Byron Barton, Goldilocks and the Three Bears by Valeri Gorbachev, and The Three Snow Bears by Jan Brett. We have been reading these three books in the classroom this week.
Two and three year olds in particular seem to enjoy reading and rereading this story. The two year olds, who are learning about personal possessions and sharing (think of all the declarations of,"it's MINE!"), can really identify with baby bear. Looks of horror and shock spread across their faces as Goldilocks not only eats baby bear's food, but also breaks his chair and falls asleep in his bed! The three year olds, who are all about obeying the rules or at least everyone else obeying the rules (think tattle tailing), are quick to point out all the rules that Goldilocks is breaking. At the end of The Three Snow Bears, Alooki, the Goldilocks character, runs off still wearing baby bear's shoes, and the children, who were quick to notice this, seemed to be really upset. They could not believe that she hadn't given them back!
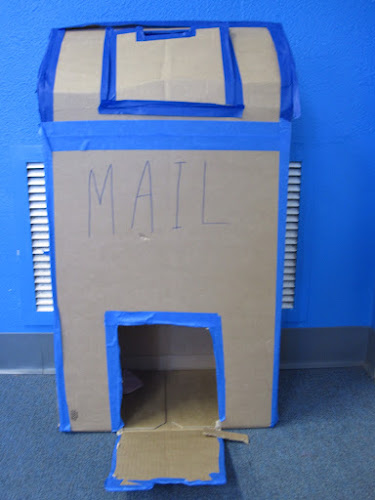
As part of our Goldilocks and the Three Bears theme, we set up a three bears house in the dramatic play area. 
 We added the three bear's chairs, a great big Papa Bear chair, a medium sized Mama Bear chair, and a wee little Baby Bear chair. 

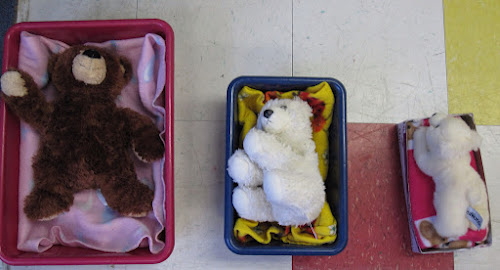
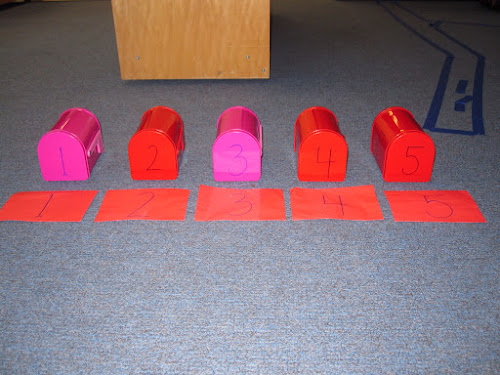
We used different sized boxes for the bear's beds. 
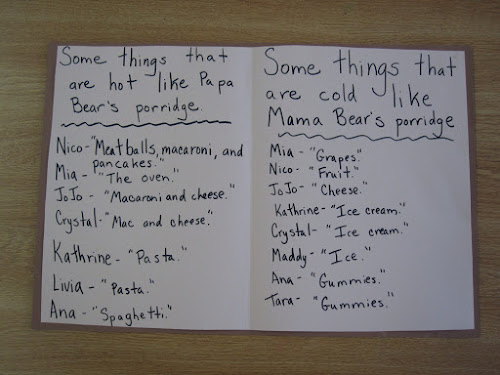
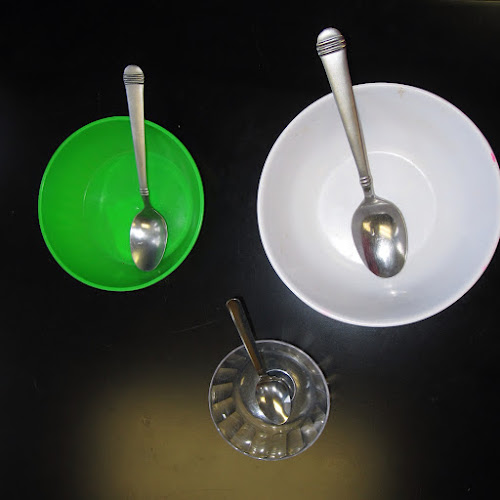
And different sized bowls and spoons for their porridge. 
 The children spent the morning feeding the bears, trying out the chairs, and putting the bears to bed. When they noticed that there was no Goldilocks, we added a doll to play the part. 

Tuesday, February 14, 2012

Valentine's Day Mailboxes

This year we made our Valentine's Day mailboxes out of empty cereal boxes. I cut the cereal boxes in half and covered them with white paper before giving them to the children to decorate.
We set out bowls of glue, 
 heart shaped doilies, 
and shiny foil hearts. 
 With these supplies, the children decorated the boxes however they liked. 
 Of course we used glitter too. 
Lots, 
and lots, 
 and lots of glitter! 
 When they were dry, I poked holes in the back of each box and threaded pipe cleaners through the holes...
 so that we could attach them to the backs of our chairs. 
 Happy Valentine's Day!

Friday, February 10, 2012

Letters and Mailboxes

 As part of our unit on Valentine's Day, we have been talking about letters, mail carriers, and mailboxes. I found these mailboxes in the dollar section at Target and wrote the numbers 1 to 5 on them with a magic marker. I also numbered some envelopes, and the children put the corresponding envelope in the mailboxes.
We also made a large mailbox out of a cardboard box. 
 And I brought in this mailbag that I made at home. 
 The writing center is stocked with cards and envelopes that the children write on and then either deliver to their friends in the mailbag...
 or drop in the mailbox. 

Tuesday, February 7, 2012

Marble Painting

 We first tried marble painting a few weeks ago and the children enjoyed it so much that we decided to do it again this week. This time we used it on hearts for Valentine's day. I decided to set up the supplies on the floor since it requires a good deal of shaking to get the marble to roll around. Each child was equipped with a plastic box, a heart cut out, and a marble. I set out little bowls of red, pink, and purple paint for everyone to share. We placed the hearts in the boxes and got ready to paint.  
The children dropped the marbles into the paint of thier choice and either dumped the now paint covered marble onto the paper or used their fingers to fish it out. The second method was by far the most popular because two year olds love to get their hands all painty. 
 Then it was time to shake, 
shake,  
 shake!
 Once the paint on the mable was all used up, the children dropped it into another color and did some more shaking. 
So pretty!

Monday, February 6, 2012

Heart Sun Catcher

 Every once in a while I like to do a group art project, something that everyone works on together. It's true that no one gets to take it home to share with their family but it teaches teamwork. It's also nice to look at it in the classroom and talk about how we made a beautiful piece of artwork together. Our proje t today was a heart shaped sun catcher. 
I cut out a large heart from contact paper and taped it to the table with the sticky side up. I set scissors and red and pink tissue paper on the table too.  
 The children set to work cutting up the tissue paper and sticking it to the heart. Some of them quickly grew tired of cutting the paper and resorted to ripping it, which ended up being much more fun. 
 When the heart was completely covered, we stuck it to one of the windows in our classroom and admired our work.