Thursday, December 13, 2012

Painting with Bows

This is a fun and festive alternative to painting with paint brushes. Last week, I bought a bag of gift bows at the store, and I had some paint stirring sticks left over from all the painting we did when we were getting the school ready.
I attached a stick to each bow so that we could paint without getting our hands dirty (although some of us still did). Then I put red and green paint on plates and we started painting.
Happy painting!


Wrapping Presents in Preschool

Every year at Christmas time, I set up a present wrapping center in the classroom. Ripping tape, cutting, and folding paper are great small muscle activities for young children. Besides, it's lots of fun to wrap and open presents!
To set up, I fill the wrapping center with rectangles of wrapping paper,
bows,
scissors, tape,
an assortment of boxes,
and some small toys from around the room.
As children came to the center, I explained how to rip the tape and fold the paper around the boxes. After a little while, they can usually do the folding on their own, but the tape can be a bit more difficult (so be prepared to go through lots of it!)
Of course, opening the presents was the best part!
Even though they knew what would be inside, the children got so excited as they ripped the paper and opened the boxes!


Tuesday, December 11, 2012

Christmas Countdown Calendar

I wanted to make a calendar for my class to count down the days to Christmas. I wanted to make it more interesting than simply removing numbers. At the same time, I didn't want to put prizes under each number like the traditional Advent calendars do because it would be difficult to fit enough prizes into each box for eight children. Then I remembered seeing somewhere on the Internet, although I can't remember where, the idea of putting an activity under each number.
I came up with little activities that we could do at circle time each day. Most of them were very simple (balance a bean bag on your head or balance on one foot). Some were longer and a bit more fun (decorate the Christmas tree). For each activity, I found a picture to go along with it, printed out the picture, and glued a sentence explaining the activity on the back.
I had the children paint toilet paper rolls with red and green paint. Once they dried, I cut them in half, stapled one end of each closed, and pasted numbers on them.
I only used the numbers 1-15 because there are 15 days of school in December before Christmas this year. I put one activity paper inside of each box (and marked on my calendar which activity was in each box so that I would remember). Then, I used clothespins to hang them from strings in our circle time area.
Every day a different child chooses a number and opens it for the class. It's very exciting to see what we will do each day!

Friday, November 16, 2012

Pine Cone Turkeys

A few weeks ago I was taking a walk and found a whole bunch of pine cones that had fallen from a tree onto the sidewalk about a block from the school. Later in the day, I went back with some of the children to gather up the pine cones. At the time I didn't have a plan for them but I was sure they would come in handy with the holidays coming up.
Today, we used some of the pine cones to make Thanksgiving turkeys. I showed the children how to squeeze some glue onto them and tuck feathers into the pine cones.
Then we added eyes and a little piece of orange pipe cleaner as a beak.
Aren't they cute!


Thursday, November 15, 2012

What Will the Ants Eat?

Last week we found a whole bunch of pill bugs under some rocks in our playground, and ever since then the class has been all about bugs. Every time we go outside we turn over all of the rocks to look for bugs, though the bugs seem to have learned their lesson as we never find them under the rocks anymore.
 
Still, we look for bugs outside every day and yesterday we found some ants marching around looking for food. We wondered what kind of food the ants would like to eat and decided to find out. I put together bits of random food that we had in the classroom to make an ant food platter.
Before taking it outside, the children predicted what they thought the ants would eat. Then we took the ant food platter to the spot where the ants were crawling around. We took everything off the plate, except for the honey, and put the food in different spots around the ants.
After watching for a few minutes, the children realized that the ants weren't going to start eating right away, so they went off to do other things. Every few minutes someone would check on the ants to see if they had started eating yet. After about ten minutes one little ant found the apple slice.
Everyone was very excited! As we watched, the ants also found the goldfish and the honey.
We left the food out during nap time and came back to look at it in the afternoon. It turned it that once the ants found the honey, they forgot about the other food and all starting feasting on the delicious, sweet honey.
I printed out a picture of the food we had put out and typed up the predictions the children had made before the activity, and hung both in the science center. I also wrote down the outcome of the experiment. The children kept coming to the center to "read" about the experiment. They were also very excited to show it to their parents later in the day.
 
This experiment made such an impression that the children started talking about it again first thing this morning. So I came up with this art project to go along with the science project.
I made paper cut-outs of the foods we gave to the ants and let the children glue them onto construction paper. Then I gave them black paint and showed them how to make fingerprint ants. It didn't matter that the pictures weren't exactly accurate. What is important is that the class was learning about the scientific process by making predictions, experimenting, and recording their findings!

Friday, November 9, 2012

Building Bird Nests

This week our class has been interested in birds. On Wednesday we watched a video of a bird building a nest and talked about what birds' nests are made of. We talked about how birds collect twigs, leaves, and other things to use for their nests. When we went outside, we pretended we were all birds and collected lots of small sticks. Then I gave the children paper and glue...

and they set to work...

Here is one of the finished products:

Today, when all the glue was finally dry, we made these little Pom-Pom birds to sit in the nests.

It may not be apparent at first glance that they are birds but, if you look closely, you can see that the blue one has two pink eyes and a purple beak.


Saturday, November 3, 2012

Mixing Colors with Eye Droppers

Our class has been working a lot on small muscle skills over the past two weeks. One of my favorite small muscle activities is using eye droppers. Last week we used them to mix different colored paints. I started by squeezing about a tablespoon of washable tempura paint into a bowl and then filling the bowl with water to make a very watery paint solution. I did this with four different colors.

Next, I gave each of the children an eye dropper and a clear cup filled with water (I used clear cups so that they could really see the colors mixing). At first the children didn't understand that they had to sqeeze and then let go before the eye droppers would pick up the paint. But after a little practice, they were able to get some paint into them and squeeze it into the water.

Once they got the hang of it, everyone really enjoyed seeing the different colors and shades they could make their water.

They liked it so much that they refilled their cups with clear water and mixed new colors for about an hour.

Besides helping children to develop the small muscles in their hands and fingers, this activity is a good science project because it allows them to experiment with mixing. I loved that some of the children would try to remember the colors they had mixed previously so that they could reproduce the results.


Tuesday, October 23, 2012

The Rainbow Fish Printable Game

The Rainbow Fish  by Marcus Pfister is a wonderful book about sharing, and is a staple in many classrooms. Last week, my class wanted to read it over and over. Every time we read it, we talked about how nice the Rainbow Fish was to share with his friends. Every time one of the children shared a toy with a classmate, I said, "You shared like the Rainbow Fish!"

With all this talk about sharing and the Rainbow Fish, I wanted to come up with an activity that would allow the children to practice sharing. This is what I made. 


Besides being a sharing activity, it also allows children to practice their number as they match the scales to the appropriate fish. 


You can download the templates I made for the Rainbow Fish and his friends below.

I colored mine, cut them out, and laminated them. To make the scales sparkly, I just brushed them with glue and and sprinkled some glitter on them. Then I put five pieces of Velcro on the Rainbow Fish.


I also put one on each of his friends and on each scale.  


Then I used permanent marker to write a number on each scale and one on each of Rainbow Fish's friends. I made sure to give him one permanent sparkly scale for himself! Now the children can take the scales off of the Rainbow Fish and share them with all of his friends!


Here's the link to download my fish templates, which you can color and cut out: http://www.aspenleafpreschool.com/wp-content/uploads/2012/10/Fish-templates.pdf


Tuesday, October 16, 2012

Family Style Dining in Preschool: A How-To Guide


Transitioning to family style dining can be an intimidating task for many teachers. Its easy to imagine a free-for-all occurring when the children have direct access to the meal, or mounds of spilled food all over the floor. In order for family style dining to work, you have to be prepared and you will need lots of patience.

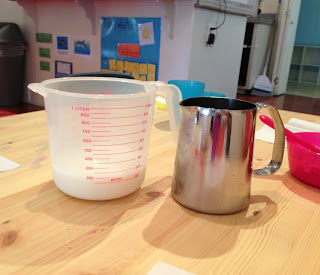
To begin, child-sized dishes and utensils are a must. If things are too big, the children will not be able to manipulate them. This will lead to lots of spilled food and both children and adults getting frustrated. Here are the bowls and serving utensils we are using now at Aspen Leaf Preschool. Everything is inexpensive (it's all form Ikea, actually). The silver pitchers are meant to be for frothing milk but they are the perfect size for preschoolers. Our serving bowls are food storage container minus the lids. They came in a pack of five and we usually use the middle-sized ones. The small serving utensils were in the children's section and are meant to be toys, but they are just perfect for serving food. They are even dishwasher safe!


 These are the dishes we use (they're also from Ikea).


I have the children help me put the food into the serving bowls. Usually I'll choose one or two children to help with this, and one or two others to set the table. At the beginning, I'll set a napkin at each seat and instruct the children to place one bowl or plate on top of each napkin.


Then one cup and one spoon or fork on each plate. Later, when they have gotten used to the process, they are able to set the dishes out without the napkins marking the spots.


We always wait for everyone to sit down before starting the meal. To pass the time while we wait for everyone to sit down, I ask the children to open their napkins and "set their places." A set place looks like the picture below.


Once everyone is at the table, we sing (about our hands):

 Open, shut them,
Open, shut them,
Give a little clap, clap, clap.
 Open, shut them,
Open, shut them,
Put them in your lap, lap, lap.
 
This helps to get everyone's attention, calm the children down, and let them know that the meal is about to start. Before passing the bowls around, I show the children how many of each food they should take. I do this by serving myself and narrating what I'm doing. For example I would take two scoops of cereal and say, "This is the cereal. I can take two scoops. One, two. Now I'm going to pass it."


If we are having toast or bagels, I will set out a bowl of jelly. The children take a scoop of jelly with the serving spoon and then spread it with their knives (whenever we use knives we talk about how to be careful with them. Even though they are only plastic, it is important for children to know how to be safe with them).


The hardest part about family style dining is allowing the children to pour their own drinks. Inevitably they are going to spill, and at the beginning they are going to spill every time. But practice makes perfect and after a week or so, everyone will being pouring pretty well. For the first couple of weeks, I will use two pitchers. One big and one small one. I'll fill the big one with milk or water and pour only little bits into the smaller pitcher at a time. The children then pour from the small one. This way they can pour all of it without over-flowing their cups.


Once they get used to pouring, I fill the small pitcher about half way and show them how to stop pouring before the cup over flows.The first time a child pours without spilling is a big deal and I always make sure to compliment him or her.


At the end of the meal, each child cleans up his or her own place. We have a nice big sink in the classroom for all the dirty dishes, while napkins and uneaten food are placed in the trash. Every day we talk about what goes in the trash and what goes in the sink. If you're not mindful, you'll end up losing all of your dishes to the garbage!


Make sure to always sit down with the class and demonstrate the kinds of behaviors you expect from them. In order for this to work, the teachers have to lead by example. So make sure to set a place for yourself! Once everyone gets used to family style dining, you will find that it is much easier than making plates for the children and serving them. It is also much more pleasant to sit at the table with the children and have a conversation than it is to stand over them refilling their plates and cups.

To read about the benefits of using family style dining, check out my earlier post Family Style Dining in Preschool: Why it's Important.